
The rain gauge shows half an inch. Up by the road, the soil still crumbles in your hand. Down in the hollow, your boots are picking up mud. You’ve got time to irrigate one block before the crew moves on. Which valve do you open?
You already know where water tends to sit after a storm. Add a moisture reading from below the surface and you can check whether the roots in the upper block have enough water. That’s where I’d start with farm technology. Pick a decision you face often, then find a tool that helps you make it with what you know about the land.
Table of Contents
- Begin with a decision you face every week
- Put your field notebook somewhere you can search
- Read soil moisture below the surface
- Let weather alerts guide your field walks
- Test the idea on a few rows
- Count the full cost before you expand
Begin with a decision you face every week
Think back to the last time a small mix-up cost you an afternoon. Maybe two people drove to the same rented field because neither knew the other had checked it. Maybe you walked six rows looking for the patch of leaf damage someone mentioned at breakfast. A shared note or a pin on a phone map would give either job a clear starting point.
Choose something you can act on during a normal week. If your irrigation water comes on fixed days, check the soil before your turn so you know which crop needs water first. On a rain-fed farm, record when you planted, what the seedbed felt like, when rain fell, and when the seedlings came up. Next time you’re weighing up whether to sow before a shower, you can see how that field behaved under similar conditions.
A good first test fits into a job somebody already does. A pencil and a pocket notebook work well at the muddy end of a row. A phone earns its place when that note needs to reach the person doing the afternoon rounds.
Put your field notebook somewhere you can search
Give every block the name the crew actually uses. If it’s known as Windmill Field, put Windmill Field on the map and in the log. Mark gates, water points, and places that give you trouble year after year. A phone photo of a hand-drawn map is enough to get going.
Keep each entry short enough to make by the gate. “Windmill Field, May 18, beans up in six days, thin stand near the gate” tells you where to look after the next rain. Note the date, the crop, what you saw, and what you did about it. If two people are recording harvest weights, agree on pounds or kilos before the first load comes in.
The same idea works in the yard. When you replace a trough’s float valve, save a photo of the part with the trough’s location and the date. If it overflows again, whoever finds it can look up which part was fitted and how long it lasted.
A shared spreadsheet works fine if everyone doing the job can open it. Try pulling up the log at the far gate, where reception tends to drop. If you’re taking notes offline, agree on who’ll sync them back at the shed.
Read soil moisture below the surface
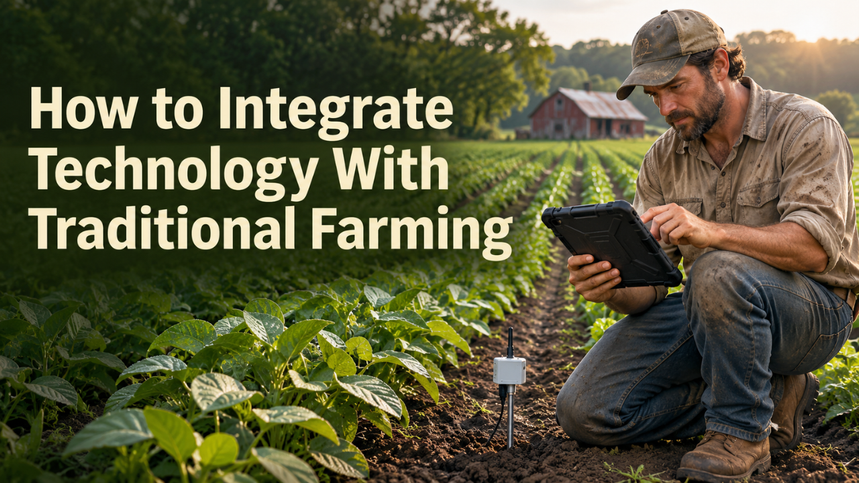
The top inch can dry out while there’s still moisture farther down. Place sensors at different depths in the part of the soil where your crop’s roots are active. Choose rows that represent the ground you want to manage. Follow the installation instructions so each probe makes good contact with the soil, and flag the spot before the next equipment pass. If you water a sandy rise and a heavier patch separately, give each area its own check.
Spend a few watering cycles getting to know the readings. Use a trowel or soil probe to take a sample near the sensor at a similar depth, then compare how the soil feels with what the display says. Watch how the numbers move after rain and how fast they fall between irrigations. When you’re ready to set an alert, ask a local agricultural adviser to help you pick a starting point for your crop, soil, and stage of growth.
Say a few tomato plants at the end of a drip row still look thirsty after you’ve watered. Check the soil there and beside a plant nearer the valve. If the far end is dry and the near end is damp, inspect the line and its emitters. After the next watering, see whether moisture reached a similar depth at both ends.
Let weather alerts guide your field walks
Check your local weather forecast alongside your crop bulletin. Say you’ve had a run of damp mornings and the bulletin flags disease risk for beans. Move that field up the scouting list. Look at plants in several parts of the field, including spots where leaves tend to stay wet longest. Mark where you find symptoms and record the crop’s growth stage. Once you’ve identified the problem, use local guidance to decide whether it warrants action.
An aerial image can help you find a patch you’d miss from the gate. If a stretch of corn looks pale from above, save the location and walk the patch. Look at the plants and soil there, then visit a healthy part of the field for comparison. A pattern that follows a wheel track gives you a reason to check for compaction. Record what you find while you’re still there.
On a small plot you already walk end to end, mark the row when you spot a problem and take a photo. You can bring up the last shot while you’re standing there wondering whether a patch of yellow leaves is spreading.
Test the idea on a few rows
Try the tool on a piece of ground you know well. For an irrigation test, pick several pairs of similar, equal-sized beds or strips that you can water separately. Flip a coin in each pair to assign one to your usual watering routine and the other to sensor-guided decisions. Match the crop variety and planting date across the test. The repeated comparisons help you see whether the result holds up beyond one unusually good or bad row.
Decide what you’ll measure before the first watering. If you want to cut water use, measure the volume with a flow meter where you can. If you’re trying to reduce trips to the pump, log each trip and how long it took. Weigh what you can sell from each bed, too. You’ll want that figure in front of you when you see how much water or time you saved.
One hot week can tell you whether you’ll use an alert when the farm gets busy. A season of notes tells you more about the crop. If a saving keeps showing up across the beds and the harvest is comparable, you have a reasonable basis for trying it elsewhere. If the difference comes from one strip by the hedge, take a closer look at that strip and run the test again.
Count the full cost before you expand
The sticker price is the first line in the budget. Then come setup time, replacement parts, possible subscriptions, and whatever it costs to get someone out when a unit fails during your busiest week. For a rough seasonal estimate, spread the hardware cost over the years you expect to use it. Add what you’ll spend each season and compare that total with the inputs you saved and any change in sales. Cut two half-hour trips a week for 12 weeks and you get 12 hours back. Keep track of that time alongside what you actually saved in cash.
Ask for a demonstration before you buy. If you keep overlapping passes when you spread fertilizer, try a basic GPS lightbar. It gives the driver a visual cue to line up each pass. Measure the overlap on a few typical passes, then measure it again with the lightbar. Check that it fits your tractor, gets the signal it needs on your farm, and can be serviced nearby.
Take the same practical approach to apps. Export a copy of the records and open it. Show the person who covers your rounds where to find the latest entries. Agree on the field check you’ll use when a battery goes flat and there’s still a job to do.
On your next round, write down one thing you’d want the person coming after you to know. It might be dry soil below the surface after rain or a patch of beans worth checking again on Friday. When a tool makes that detail easier to find and act on, it’s doing a job the farm already needed.